Snow in the White Mountains is beautiful until it starts testing your roof. If you own or plan to buy in Eagar or Springerville, you know winter can pile up fast at about 7,000 feet. You want a home that holds up, stays dry, and keeps insurance easy. In this guide, you will learn how the town’s design numbers translate into smart roofing and deck decisions, what upgrades matter most, and how to document work for permits and insurers. Let’s dive in.
Start with the local rules
Before you pick materials or call a contractor, confirm what the Town of Eagar has officially adopted for building codes and the current design criteria. Designers use ASCE 7 and the International Residential Code to convert local inputs into loads on your roof and connections. The town publishes key numbers you will rely on: ground snow load of 32 psf, basic wind speed of 115 mph, and a town‑specified frost depth. Always verify the current code edition and any local amendments with the building department before work begins.
Why this matters: the same numbers can produce different design forces depending on code edition and factors like exposure, slope, and thermal conditions. Getting this right upfront keeps your project on track and helps approvals move smoothly.
Turn town values into design actions
Snow load: from ground to roof
The 32 psf you see published is a ground snow load. Engineers convert that to a design roof snow load using ASCE 7 methods. The conversion considers your roof slope, how warm or cold the roof is, exposure to wind, and any spots where snow can drift. The final roof snow load is what sizes your rafters or trusses and sets requirements at valleys, parapets, and step‑downs.
Key points:
- Snow drift can control design at roof intersections and behind taller walls.
- Local reinforcement may be needed even if the average load is moderate.
- Use stamped truss drawings or a structural engineer’s design for any framing changes.
Wind: 115 mph to uplift and bracing
The 115 mph basic wind speed converts to design wind pressures based on your site exposure, building height, and roof shape. Those pressures drive decisions about roof‑to‑wall connectors, sheathing thickness and nailing patterns, gable end bracing, and how securely you attach anything to the roof. The goal is a continuous load path that carries uplift forces from the roof all the way to the foundation.
Frost depth: what it means for footings
The town’s frost depth sets minimum footing depths for additions, porches, and decks. Posts or piers must extend below that frost line or use an approved frost‑protected shallow foundation solution. This prevents freeze‑thaw heaving that can crack slabs, twist decks, or open leaks where structures meet the house.
Practical upgrades that work in Eagar/Springerville
Roof framing that carries the load
If you are building new or re‑framing, specify engineered trusses or properly sized rafters designed for the local roof snow load and 115 mph wind uplift. Trusses are often the most efficient path because a manufacturer will provide stamped drawings that reflect site loads. For existing roofs that feel bouncy or show sagging, consider upsizing rafters, tightening spacing, or adding purlins and blocking where needed.
Do not forget connections. A continuous load path usually includes metal hurricane straps or ties at rafters or trusses, proper top plate connections, and anchors that tie walls to the foundation. Upgrading sheathing thickness and using ring‑shank nails with closer spacing can improve wind performance.
Roof coverings and underlayment that survive winter
Material choice affects both performance and maintenance.
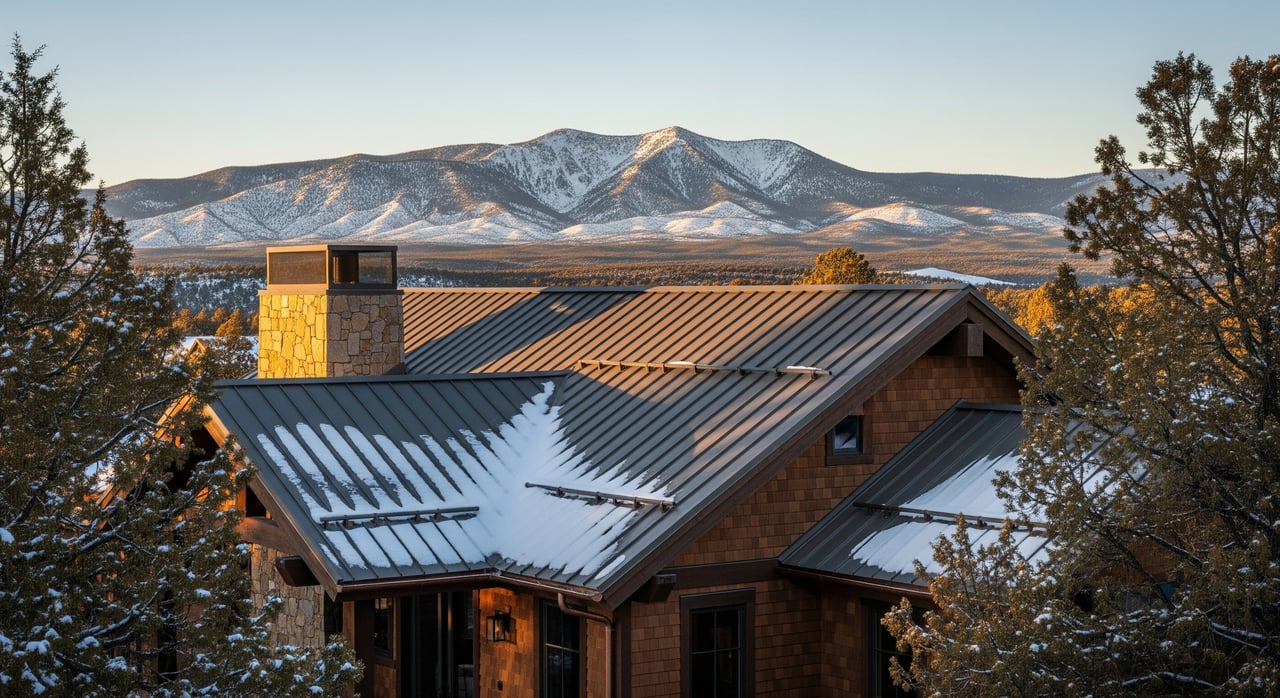
- Standing‑seam metal roofing sheds snow efficiently and reduces ice‑dam risk when paired with good insulation and ventilation. It often needs engineered snow retention so slides do not endanger people or damage gutters.
- Asphalt shingles are common and work well when you use robust underlayment, an ice and water barrier at eaves and valleys, and maintain adequate slope. Replace aging shingles before they become a water problem during freeze‑thaw.
- Low‑slope roofs demand careful structural checks for ponding and snow accumulation. They may need reinforcement and specific membranes.
Use manufacturer‑approved flashings around skylights, chimneys, and vents. Freeze‑thaw cycles can pry open weak details, so curbs and counter‑flashings that shed water are worth the attention.
Ice dam control with insulation and ventilation
Two goals guide your attic strategy: keep eaves cold and manage moisture. Continuous attic ventilation with intake at soffits and exhaust near the ridge helps maintain uniform roof temperatures. Pair that with a tight air barrier at the ceiling and adequate insulation so warm air from the home does not melt the roof snow.
Practical steps:
- Seal air leaks at the ceiling plane before adding insulation.
- Add baffles at eaves to protect airflow from being blocked by insulation.
- Consider rigid insulation above the roof deck during re‑roofing if you are re‑building the assembly, knowing it requires new flashing details.
Attachments, fasteners and hardware that hold
Wind and snow loads test every connection, not just the big beams. Use hurricane straps rated for your calculated uplift at each rafter or truss. Improve sheathing fastening patterns and select corrosion‑resistant fasteners, like hot‑dip galvanized or stainless, for the mountain environment.
Chimney straps, satellite mounts, solar racks, and HVAC curbs must be anchored to structure, not just sheathing. Follow manufacturer engineering for snow retention systems on metal or tile roofs. Do not guess spacing or layout.
Decks and porches built for snow
Decks and porch roofs often live where snow slides off the main roof. That means they can see loads that exceed typical occupancy numbers. If snow sheds onto a deck, verify it can handle that combined load, or change roof geometry and add snow retention to control it.
Good practice includes:
- Through‑bolted ledgers with continuous flashing and proper backer, or better, independent beams and posts that bear to foundation.
- Concrete piers or footings that extend below the town’s frost depth, with metal post bases for uplift and twist resistance.
- Joist hangers and connectors rated for vertical and lateral loads.
Foundations and drainage that do not heave
Footings belong below the frost depth unless you use an approved frost‑protected shallow foundation design. For decks and porches, avoid posts that simply sit on grade. Keep drainage away from footings with proper grading and downspout extensions so freeze‑thaw does not undermine supports.
Permits, inspections and insurance confidence
What usually needs a permit
Structural changes, roof replacements that involve framing, new decks or porches with ledgers, and any foundation work typically require a permit. Plan sets should include the site elevation, truss drawings if used, connection schedules, and footing details that meet the town’s frost criteria. Ask your contractor to pull permits, then keep the permit number and final inspection signoffs for your records.
Documentation insurers like to see
Insurers pay close attention to roof age, materials, and mitigation steps. You can make your case by:
- Providing stamped structural plans or truss manufacturer drawings for framing changes.
- Showing proof of upgraded connectors and anchorage.
- Documenting snow retention over entrances and walkways if your roof is steep or sheds toward egress.
- Keeping records of attic insulation, ventilation upgrades, and underlayment choices.
When to call a structural engineer
Call an engineer for any change to bearing walls, rafter or truss spacing, large openings, roof offsets, or when snow drifts will form against taller parts of the home. If you plan to convert attic space or alter load paths, get stamped drawings. For trussed roofs, use the truss manufacturer’s engineered layout.
Quick homeowner checklist
- Confirm the town’s current design criteria and adopted code edition.
- For any framing change, require stamped plans or truss shop drawings.
- Specify ice and water barrier at eaves and valleys and the right underlayment.
- Choose roofing rated for snow and wind, with engineered snow retention where needed.
- Install hurricane straps and ensure a continuous load path to the foundation.
- For decks and porches, use through‑bolted ledgers with flashing or independent supports, posts on piers below frost depth, and connectors sized for snow and wind.
- Save permits, inspections, product data sheets, and contractor receipts for future resale and insurance.
Buying or selling in Eagar/Springerville
If you are buying, ask for roof age, material, and any engineering or truss paperwork tied to the local 32 psf ground snow load, 115 mph wind speed, and the town’s frost depth. Look for ice and water membrane at eaves, visible snow retention over entries, and solid deck ledger flashing. If you are selling, small upgrades like adding eave membrane during re‑roof, installing snow guards above doorways, and documenting connector upgrades can reduce questions from buyers and their insurers. Clean records make closings smoother and can protect your valuation.
Ready to talk through a specific property or plan a pre‑listing improvement list that fits your budget and timeline? Reach out to Arizona’s Mountain Home Hunters for practical, locally grounded guidance that helps you buy or sell with confidence.
FAQs
What do Eagar’s 32 psf and 115 mph numbers mean for my roof?
- They are the town’s ground snow load and basic wind speed that engineers convert into roof snow loads and wind pressures to size framing and connections.
How do I know if my existing roof framing is adequate?
- Have a contractor or structural engineer compare rafter or truss spans, spacing, and connections against the calculated roof snow load and wind uplift for your home.
Do I really need snow guards on a metal roof in Springerville?
- If the roof is steep or sheds toward entries, walkways, or parked cars, engineered snow retention helps prevent sudden slides and is often recommended.
What roofing underlayment should I specify for winter performance?
- Use an ice and water shield at eaves and valleys, plus underlayment approved by the manufacturer and code for your roof slope and snow exposure.
How deep should deck footings be with local frost conditions?
- Footings should extend below the town’s specified frost depth or use an approved frost‑protected shallow foundation design verified by your building department.
When do I need a permit for roof or deck work?
- Structural roof changes, new decks or porches, ledger attachments, and foundation work typically require permits and inspections; verify with the building department.